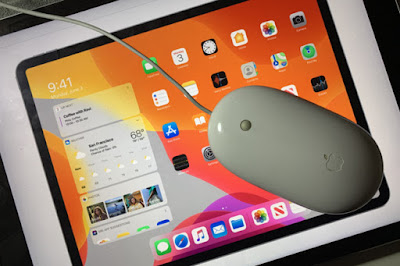
Many of the iPad users have been demanding for the mouse
support on iPad for many years. Good news is that this support is finally
available on iPadOS 13. Quite surprisingly, the mouse support is also available
with iPhone.
However, the mouse support is buried deep within the
iPhone’s and iPad’s Accessibility Settings. Even if you establish a Bluetooth
or wired connection between the mouth and iPhone or iPad, you are still going
to have to deal with quite a process related to the settings. Right now, the
major positive is that there is a mouse support.
Establishing connection between Bluetooth mouse and
iPhone or iPad
Setting up a Bluetooth mouse with iPad or iPhone is the
easiest thing you can do. You can connect any old wireless mouse using this
option. You are going to have to use AssistiveTouch menu.
First you have to make sure that the Bluetooth is turned on.
Then follow the steps mentioned below.
- Go to your Settings app
- Press Accessibility.
- Press Switch Control.
- Press Switches.
- Tap Bluetooth Devices in the menu. You will be able to put your wireless mouse in the pairing mode through this option. In this menu, the mouse name should be displayed.
Although the mouse is paired with the iPhone or iPad after
the above mentioned steps, you won’t be able to use the mouse yet. You are
going to have to turn the AssistiveTouch. If you are using Magic Mouse 1, you
will have to enter the pin which is usually 0000.
Follow the guide to turn the AssistiveTouch on.
- Open the Settings app.
- Press Accessibility.
- Press Touch.
- Press AssistiveTouch.
- Your mouse should start working now.
Setting up a wired mouse on your iPhone or iPad
Although there is a process of setting up a wired mouse on
the iPad or iPhone, the procedure can be quite awkward. If you connect anything
other than a generic laser mouse with anything below the iPad, you will get an
error message about the mouse demanding too much power.
Good thing is that you can connect any of the mice with iPad
Pro. You are going to need to buy the $29 USB-A to Lightning dongle before you
can hook up a standard wired mouse if you are using older and lower-end iPad.
If you are using 2018 iPad Pro, you will need to buy a $19 USB-A to USB-C
dongle. After connecting the mouse, you will need to work on the following
steps.
- Open the Settings app.
- Scroll down to Accessibility and press it.
- Press Touch under the Physical and Motor section.
- Now you will be able to see the menu item for AssistiveTouch at the top. It will say Off. Press this option.
- Then go to another menu and turn on the AssistiveTouch through the toggle at the top.
Calibrating the mouse
The above mentioned steps can help you run the mouse but it
is not going to work the way you use mouse on your computer. The cursor will be
a big gray circle that will mimic a fingerprint. You may be able to get the
same precision that of the cursor on the computer but it will require practice.
The circular AssistiveTouch menu stays on the screen while AssistiveTouch
is active. You can move it around on the screen using your finger. You can
active the menu for AssistiveTouch by right-clicking of the mouse. You can also
hide the menu by going to Settings > Accessibility > Touch >
Assistive Touch > AssistiveTouch and untoggle Always
Show Menu. The menu will always appear after right clicking unless you
change the settings.
No comments:
Post a Comment